The H11 HID kit that I ordered for my sister’s 2010 Mazda 3.
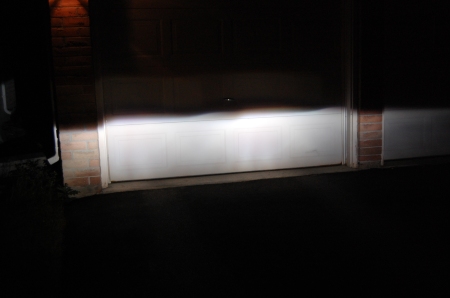

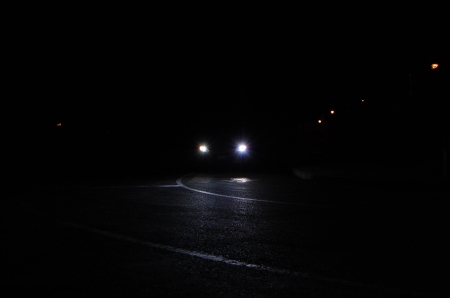


Mazda 3 (2010) H11 HID Kit
June 30, 2009Yamaha WR 450 – 4300k Motorcycle HID Conversion kit
June 29, 2009Hi Steve,
I would like to thank you for your assistance and advice with the HID lights.
I came 3rd outright and second in my class on the WR 450 Yamaha with your 4300 Kelvin HID lights in the states biggest event The 24 hour trial.
We also won the Trade team with G Slattery also running your HID lights on a Yamaha WR 250, D Burman was the 3rd member of the team on a 250 2 stroke that could only run an AC system so did not run HID’s although he wished he could.
Both G and I have used your lights in the Road trial series all year and have had no problems at all with them.
There were a few competitors using other brands but your advice on keeping to a white light was a perfect match to our high/low beam AC system.
Many people watching the event commented that we had the brightest lights with over 140 people competing.
We used them like a high low beam switching them on and off hundreds of times with no problems.
The events we have been riding have a mixture of transport road sections and competitive off road sections racing over rough rocky sections and fast rough undulating tracks.
The photos above were taken with a digital camera and do not give the true brightness of the HID lights that were an amazing increase in what was already a good 140 watt AC system.
When we turned the HID on it more than doubled the area covered by the AC system that we had set up on the bikes.
Once again thanks for a great reliable system.


Lexus ES300 – 9006 4300k Xtreme HID Conversion Kit
June 25, 2009INSTALLATION OF XENON DEPOT’S (9006/HB4) 4300K XTREME HID CONVERSION KIT
– 1993 LEXUS ES300
PRODUCT LINK: http://www.kbcarstuff.com/9006_HB4_4300k_Xtreme_Xenon_HID_Conversion_Kit_p/xt-4k-9006.htm
***Before starting any work, I disconnected the negative battery terminal.***
The installation of the kit went very well, but took longer than I expected, mostly due to the lack of space under the hood of the car. I needed to premap the route for the kit’s cabling harnesses so that they wouldn’t come into contact with any belts or potentially hot parts, and locate two points at which I would attach the ground wires. I also needed to remove the car’s two headlight assemblies so as to have more room to work. There was just not enough space to maneuver without doing so. I did not need to remove the assemblies completely but removed the three mounting screws on each and pulled the assemblies forward enough so that I could get my hand in behind and fit the new HID bulbs securely into their housings. Once that was done and the headlight assemblies were screwed back into place, the rest of the installation went quite quickly and without any hitches.
For the right-hand (passenger) side installation: I mounted the ignitor module (zip-tied), relay (zip-tied), and ballast (double-sided foam and zip-tied) next to the windshield washer fluid reservoir (see photo 1).
I zip-tied the ground wire for the RH harness along the hose that goes from the coolant expansion reservoir to the radiator. I connected the ground wire ring connector to a hex-head screw which secures a bracket to the inside of the vehicle’s engine bay (see photo 2).
The part of the harness cable (with fuse holder) that needs to connect to the car’s positive battery terminal, I routed out between the RH headlight assembly and the radiator, across in front of the radiator, and back into the engine bay between the radiator and the LH headlight assembly. I secured this portion of the harness with two zip-ties. There was more than enough cable length left to reach the positive battery terminal.
Photo 1
Ignitor, Ballast, and Relay installation – RH (passenger) side:

Photo 2
Ground wire connection point – RH (passenger) side:
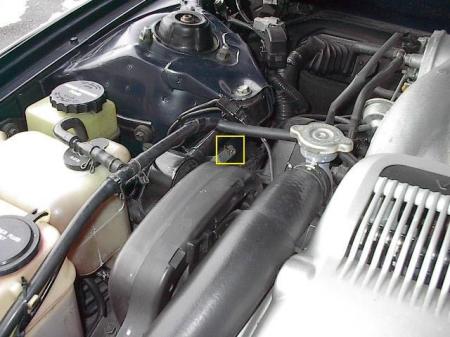
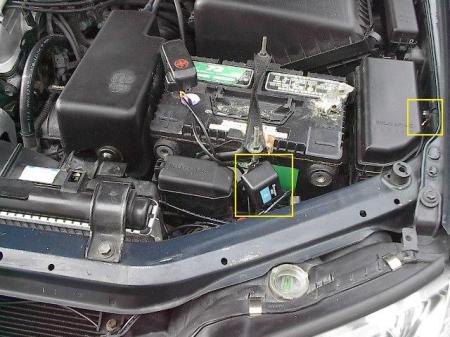
For the left-hand (driver) side installation: I attached the ground wire ring connector to a hex-head screw next to the fuse box and zip-tied the ignitor module to the battery’s front bracket (see photo 3). There was lots of extra length of wiring harness on this side so I coiled it up neatly and zip-tied it and then tucked it down into the pocket behind the LH headlight assembly. I did the same with the relay and the ballast. There was no need to physically mount the ballast to anything on this side as there is absolutely nowhere it can go when it’s tucked snugly into the small area behind the assembly. Once everything else was neat and tidy and ready to go, I connected the two power cable ring connectors to the positive battery terminal, and reconnected the negative battery terminal. Everything was now ready to test.
Photo 3
Ground wire connection point and Ignitor module installation – LH (driver) side:
Beam Comparison Photos
Silverstar Ultra Halogen Low Beams:
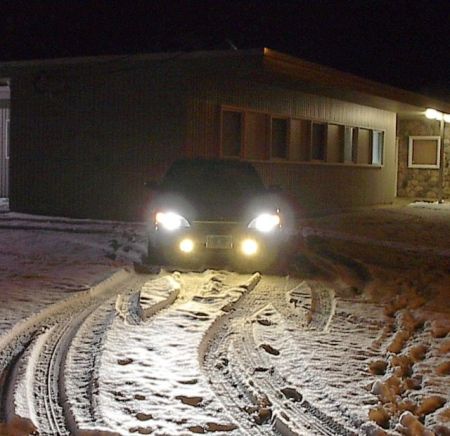 Xenon 4300K Low Beams:

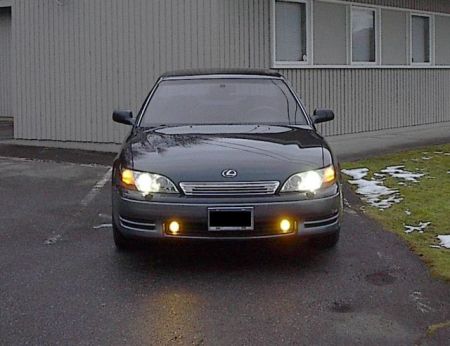
Xenon 4300K Cut-Off:

Note that the right beam is slightly sharper than the left beam. This is due to the brand new headlight assembly recently installed on the right vs. a 15 y.o. headlight assembly on the left. I can live with this as I’m not about to rip the LH assembly apart to clean it or pay major bucks for another new assembly. The outer lens of the LH assembly has been polished and is crystal clear to match the RH side. With the installation of the HIDs, both assemblies provide outstanding night vision.
With regard to the quality of the Xenon Depot kit: I would say it is top-rate. The materials used are of good quality and workmanship, and the kit came with everything needed, including a package of zip-ties, two cut-to-size squares of double-sided foam tape for mounting the ballasts, and a pair of gloves for handling the bulbs (finger prints are a no-no!).
The only thing I would modify in the kit is the shape of the plastic base on the xenon bulbs. The base is round which makes turning the bulb to lock it securely into position in the headlight assembly housing somewhat difficult. I found that because of its shape, I could not get a good grip on the bulb’s base to turn it without it slipping between my fingers. It took several minutes to get both bulbs properly locked into position. A squared or hexagonal shaped base (or a right-angled base such as on the halogen bulbs) would make installation of the xenon bulbs easier.
Honda CBR 954RR 2002 H7 6500k Motorcycle HID Kit
June 22, 2009Steve,
I ordered a 6500k Extreme HID kit off you last week for my 2002 Honda CBR954RR custom motorcycle. I got the kit installed and everything works great! The ballast is mounted in the tail section due to the 6ft. of harness where there is plenty of room and where it is out of the way. It looks unbelievable at night! I have included some pics if you would like to post them on your site. I have gotten so many compliments on it and I still have a HUGE motorcycle ralley to take it to this week!
Thanks again for all your help and hopefully I will be sending you some business.
Brett

Mazda Miata – H11 5000k HID Conversion kit
June 18, 2009For more information regarding our Xtreme HID Lighting kits please view this link:
http://www.kbcarstuff.com/HID_Kits_s/21.htm
Steve,
I just completed the installation of the xtreme lights 5000K. Although it was a lot of work, the install came out very nice and clean. I like very much the crisp white of the 5000K.
Thank you very much for returning my phone call today, and for your prompt and excellent service.
G Vega


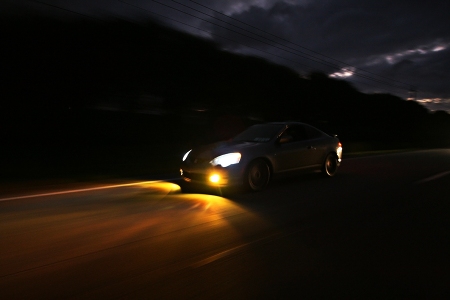
Acura RSX Testimonial – H1 6000k Volt HID Kit
June 17, 2009or more information regarding our Xtreme HID Lighting kits please view this link:
http://www.kbcarstuff.com/HID_Kits_s/21.htm
H1 6000k VOLT HID KIT
*Thanks to Joe Cipolla/J71media


Toyota 4Runner – H11 4300k HID Kit on lows & 9006 3000k
June 16, 2009Check out some more information regarding our Xtreme HID Lighting kits.
Toyota 4Runner – H11 4300k HID Kit on lows & 9006 3000k HID kit on fogs
Here’s some pictures of XenonDepot’s Xtreme Digital HID 3000k installed in fogs. There was much personal debate if I should get a cheap kit or pay more a quality kit. It’s for fogs and it wouldn’t be used unless in foul weather. But after a while of going back and forth, I decided I bought a 4Runner because of Toyota’s quality (even though they slipped, but still above others) and why should I settle for less with accessories. Another reason for going with a XD kit is the quality of their xenon kits and they supply wiring harnesses. It’s possible maybe it’s an overkill, but why take a chance. With each harness individually fuses, should one the wiring get snagged or grounded, it’s a fuse that’s blown and no harm can be done to vehicle’s electrical system.
I’ve purchased from XD before and it was a smooth and super easy transaction. I have no reservations of going back to XD and highly recommended them before and even more so now. The only difference this time was I had more interaction with Steve, aka XenonDepot on the forum, in regards obtaining the newer style wiring harness for my other car prior to ordering. Steve took care of that. Steve and XD is one of the most respected and professional retailers out there, every other retailer should model their business practices after them.
A special thanks to Steve for addressing my concerns and questions, as well as helping a few members out.
BTW, I have no affliation to XD or Steve other than being a happy and satisfied repeat customer.
Installation is simple just like all the HID kits. The only part that was a little difficult is the 3000k burners are a bit more snug than OEM halogen bulbs when putting them into the fogs. This isn’t even a problem and I see it as a good thing as the seal with the foglight housing is even tighter sealing out moisture since, the fog area can get more wet than the headlights.
Without further to do, pictures…
Goodie box

Gloves to ensure a perfect installation without getting oils and contaminents on the bulbs.

Underneath the gloves, 3000k burners

Ballasts and wiring harnesses (individually fused for each side)

OEM halogen fog

After Fog

Fogs only

From the driver’s side door

3000K HID Fogs and 4300k HID low beam

Behind the wheel

H11 4300k HID Kit for lows and 3000k HID kit for fogs


All of the pictures have no post editing done in Photoshop. The only editing done is resizing, signature and cropping.
The first seven are taken with a point and shoot in full auto mode.
The last eight with the 4Runner are taken with a slow shutter speed to get the proper exposure and no flash. I will have to check, but IIRC they were all done in shutter priority mode. (I was playing around with aperture priority earlier before the pics were taken.)
If anyone wants info on camera settings, I’ll post the EXIF data from the images.
Enjoy!
Chevrolet Tahoe (2007) – H11 6000k XenonDepot HID
June 15, 2009Check out some more information regarding our Xtreme HID Lighting kits.
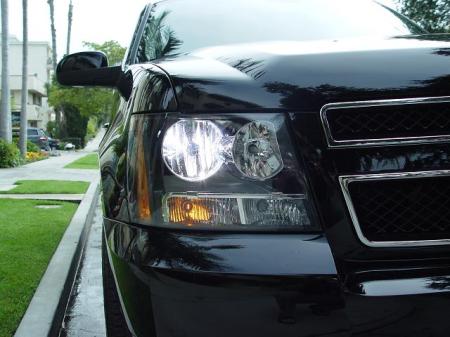
The kit installation was self-explanatory and the installation took about 45 minutes (mostly because of Chevy’s poor headlight design – since I had to take out the headlights in order to install the bulbs). You can see and feel the kit’s materials are of supreme quality and the end result both looks professional and… it makes other drivers stare in awe. Also, I passed about 15 poice cars yesterday – and none pulled me over. This kit is so high quality – it looks like it came with the car!
You can use the pictures on your site if you want and I also have more…
Best regards,
H Feiner


Chrysler 300c Testimonial – 9006 5000k XenonDepot kit
June 12, 2009Click here for more information regarding our Xtreme HID Lighting kits
One of the most noticeable modifications that can be made to a car is upgraded lighting. There are so many options out there, you can easily wind up spending your money on a product that isn’t worth the materials it was made with. It’s unanimous in the automotive world that HID is by far the most noticeable upgrade out right now. The problem is the market it plagued with poor quality kits. I first made the plunge into HID back in December when I purchased a 10,000K kit from Intense HID. I fell in love with the kit, and you could easily say for the first time I could see the light. As time went on, more mods were purchased and I ended up upgrading my headlight housings so a new HID kit was in order. Since I had purchased my kit, there had been many vendors that had make their reputation known, and this seemed like a good opportunity to see what all the hype was about.
Xenon Depot was running a promotion for a new kit they were going to be offering. I had been fortunate, because it couldn’t come at a better time. So after some talk with Steve, he put me down for a hid 5000K H1 kit. The anxiety built as they waited for the shipment to arrive. After a few weeks, XenonDepot got their supply in, and 2 days after I got a PM lettng me know, they were in my hands. So began the install…
This is what came in the package

I was happy to see the kit included Relays and Resistors. Some members report problems with other HID kits flickering, and the guys at XenonDepot included everything to prevent any problems on the customers end. The relays were a welcomed bonus because they ran power straight from the battery, but were triggered from the headlight switch in the cabin. So without any hesitation, the toolbox came out and the front fascia, headlight housings, and air filter all came out as well as the battery being disconnected. I’m assuming anyone who’s using this to help them install has read XenonDepots installation guide so you know how the components connect. Everything is one way so its pretty self explanitory. Onto the install, I started off by fitting the bulbs into the projectors.

The bulbs were a bit tough to get installed, not because there was anything wrong with the bulbs themselves, but because the K2 Projectors have a fishy clamp to keep the bulb in place. The original bulbs have indents where the wire retainer makes contact, and the HID bulbs were flat plastic. A slight modification to this clip and the bulbs were secure. I wanted to retain the rubber seals that came with the projectors so I took the extra 5 minutes to feed the wires through the holes where the old Halogen wiring poked through.

I started on the passenger side by grounding the relay, and conencting both of the positive leads to the positive battery post in the front of the car (yes I know the battery is in the back but this is for lack of better words.

Next up I secured the relay to the best spot I could find. My goal in the install wasn’t to make any holes in the car, I still have to install an HID kit in the fogs, and the ballasts for my halos, so I didn’t see any need to go making things permanent until all the under-the-hood components were available for me to see what fits where. I also chose to have the fuses mounted easily accessible in case a fuse gets blown for some reason, it would easily be swapped out. The choice for mounting the ballast was pretty random, and is going to be moved to where the drivers side is mounted as you’ll see ahead. Finally I wanted to keep the igniter close to the headlights, as there is only 7 or so inches of wire to work with.

With one side mounted, and zip ties cleaned up, the lights got plugged in and tested. It was important to test with the car running and with the car off to make sure no flickering, buzzing, or perhaps some new unheard of problem. With everything good to go (let the lights run for a few minutes while I got some lemonade to quench the thirst), it was time to move onto the drivers side.
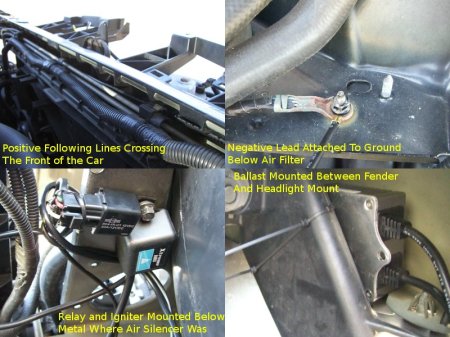
The power line for the drivers side I ran parallel to the other lines running across the front of the car. It hid well, and had plenty of slack to spare. Next I attached the ground wire to a ground that is right below where the air filter would be. Underneath the ground, I mounted both relay and igniter which should stay well out of site with the air filter installed again. Finally I mounted the last ballast on the side of the plastic headlight mount. This spot worked perfectly, and was out of the way. I goofed up as you can see in the picture because I forgot to feed a zip tie through the other side of the ballast, but it was a quick fix. Once again plugged in the bulbs and tested everything. All was well.

After is all is said and done, the install took a little over an hour to get pictures taken, and explain to every passerby why my car was torn apart in the hotel parking lot. I’d have to say, I am thoroughly impressed with this kit. The components are definitely well built, no loose wires with the connections, and I don’t see any reason this kit won’t be able to take a beating from heat, cold, etc. There is plenty of slack on all the wiring to keep your options open for where to mount everything as well which was much appreciated. Most of all, the light output on the kit is nothing short of amazing. The light is pure white, and I have already received compliments from a dozen people at the car wash, and the lights have only been in the car for 48 hours. Thankfully either the bulbs or my projectors are preserving my cutoff I had prior to the HID kit, and I’m sure everyone on the road can appreciate that. XenonDepot lived up to their reputation with me. They maintained good contact to ensure I got what I needed and was satisfied. If I do end up upgrading my high beams to HID, I know where I’m going to be heading with my 5000K HID.


Toyota Celica – H7 6000k XenonDepot HID Conversion Kit
June 10, 2009For more information regarding our Xtreme HID Lighting kits please view this link:
http://www.kbcarstuff.com/HID_Kits_s/21.htmXenon Depot 6000k HID Install – Larry Dougherty


Printed instructions from Xenon Depot

Box the HIDs come in
Contents of the package

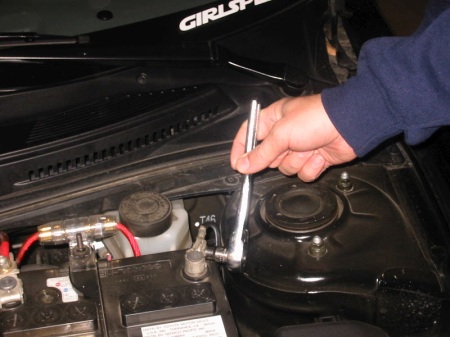
Disconnect the negative terminal of the battery

Now you real work starts. You have to remove the headlight in order to put the new bulbs and all the wiring in place. To remove the headlight there are three bolts. Two are easily accesible but for the third you have to remove the 2 side bolts that hold the front bumper on. If you remove these 2 side bolts on the bumper you should be able to pull the bumper far enough out from the fender to get to the bolt holding in the headlight as shown in the picture.

This is one of the other two bolts to remove to take out the headlight.

This is the other of the two bolts to remove to take out the headlight.

This picture shows the location of all 3 bolts that need to be removed to take out the headlight. Once all the bolts are removed you can unplug the harnesses for the bulbs and remove the headlight from the car.

Now that you have the headlight out make sure you put it on a surface that will not scratch the headlight itself (ie. towel). First thing you need to do is remove the rubber grommet.
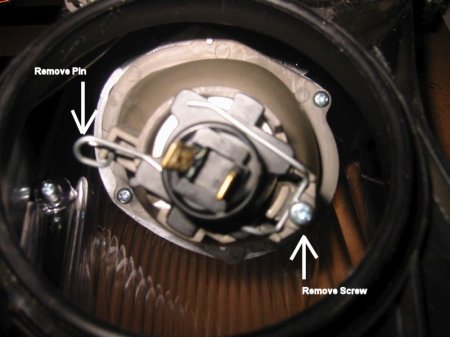
Next you want to remove the pin that holds the bulb in place. To do this you first need to loosen the screw and then remove the pin.

Now this was the hardest part of the entire install for me. You have to reshape the pin to hold in the new HID light. The first pin took me almost an hour to finally get it to hold the light in really tight, after I figured out what shape I wanted the second pin was a piece of cake.

Finally you can put your rubber grommet back in place and your headlight is ready to go. Repeat the last steps for the other headlight.

This picture shows where I decided to mount the box that comes with the kit for the driver side headlight. You are free to mount it whereever you want but I found a true lacking of space made this a harder task then I would have expected. I managed to use zip ties and double sided tape to hold the box in place.
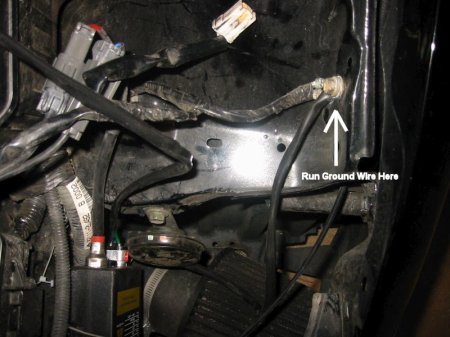
Next you have to run the ground wire from the box to the chassis of the car. Conveniently enough there was already a wire being grounded less then a foot away from the box so I just decided to use this spot. You can use any ground but make sure there is no paint on the surface as you want a good ground.
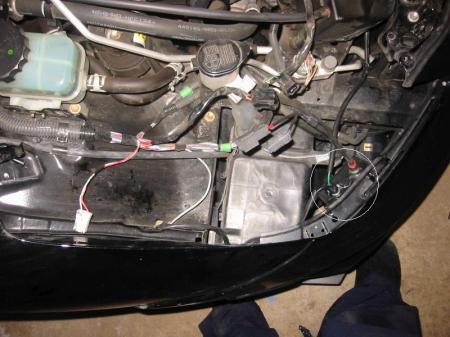
This picture shows where I mounted the box for the passenger side headlight. Once again I used zip ties to hold the box securely in place.
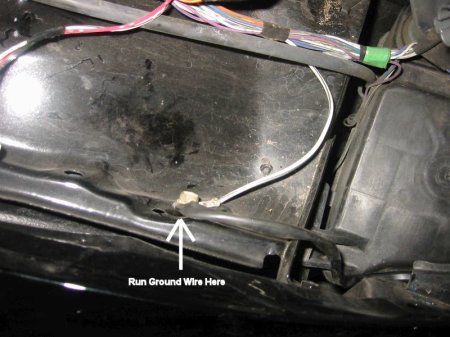
Now you need to run the ground for the passenger headlight. Once again there is a wire already being grounded close to the box so I used the same spot again.

Next you want to run the power wire from the HID harness to the positive terminal of your battery.
The last few steps I did not take pictures of as its pretty self explanitory but you need to finish connecting the harness to the HID box if you have no done so already. Also run the ACC (headlight on) connector from the harness to the factory ACC (headlight on) in the driver side headlight area. I’m sorry as I have no picture of this but the connector is very easy to find as there are only once of its shape and you disconnected it earlier to remove the headlight.
Lastly, you need to reconnect the negative terminal of your battery.
Now that everything is hooked up turn your headlights on and make sure everything works as it should. If all goes well you will have a nice bright glow from your lights and a warm feeling inside :).
Now bolt your headlights back in place and reattach your bumper; time to enjoy the lights.
Here are a few pictures of the completed 6000k lights.


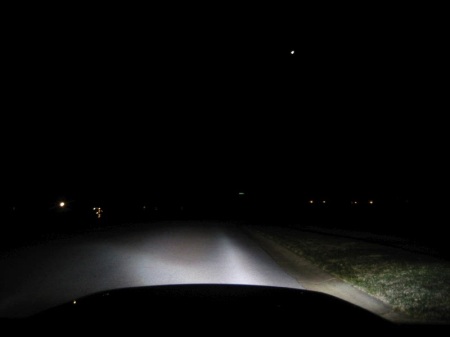


 Posted by HID Kit Blog