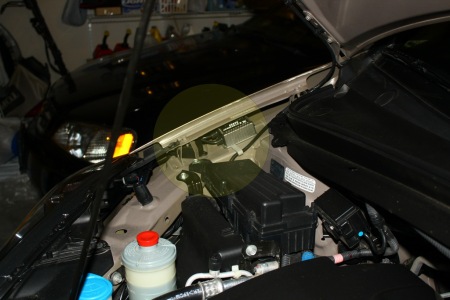
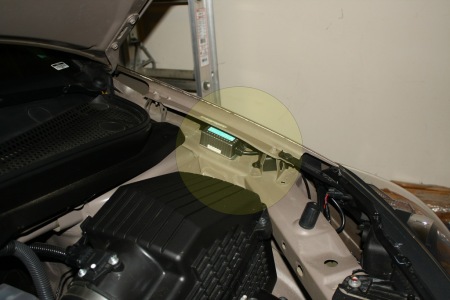
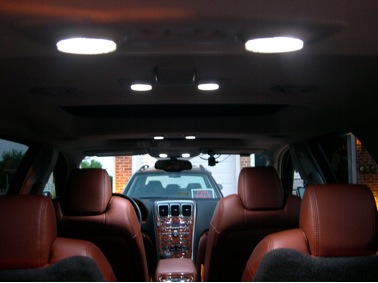
See the complete Install Guide here:
GMC_Acadia_Putco_LED_Interior_Light_Install
Check out our Facebook page for updates about new products, promotions, and much much more!
I just installed my Xtreme HID kit from Kbcarstuff
I received this product in a nice box where everything was secure and organized.
Installation: The entire installation took me about 45minutes including trying to find some screws to fasten down a few things and having no install instructions. It was easy to install and pretty much was common
sense to put together…
(Make sure your lights are off and key out of ignition)
1. I disconnected and took out my battery (make sure at least negative wire on battery is disconnected)
2. Remove old 9006 bulb (make sure it cooled down)
3. I put the new Xenon bulb in my original 9006 housing.
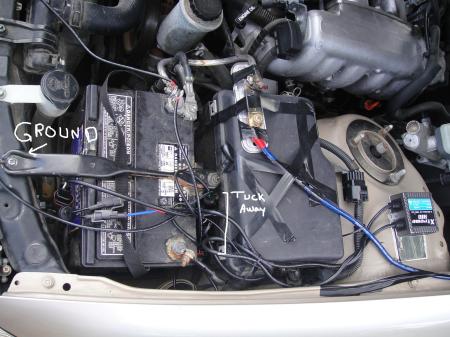
4. Connect Ballast plug to the other plug, which one wire is connected to the Relay and other wire is your ground* (One wire from Ballast should already be connected to Ignitor)
5.Connect Red & Blue plugs from Ignitor to Red & Blue plug of the new Xenon bulb.
6.Relay Plug connects to original bulb plug.
7.The Fuse is connected from relay which you want to connect positive terminal of Battery
8.Enjoy
* I connected the right side ground wire to the bar that is screwed in directly in front of battery.
Left Side: Follow the same procedure as right side. I grounded the wire
to a flat area on the metal bar. (You might find little, sticky,
circular things on the bar. I removed one and scratched the paint off
with a knife and screwed down the wire to the already made hole there.)
Final thoughts: I’m very happy with my new kit and Color temperature
matches of what I expected. These are a tad brighter than my Mom’s 2006
Lexus ES330 factory lights which I know are supposed to be around
4000-5000K. They worked up to my expectations and I feel like I have an
up to date vehicle. The cutoff is very fine and there is no glare. Very
high quality lights. I would recommend to anyone.
One improvement: I like it when the protective rubber is nice and thick and the smaller wires could be larger too.
Thank you for a good product and I will come back again!
-Ryan


Hello Steve,
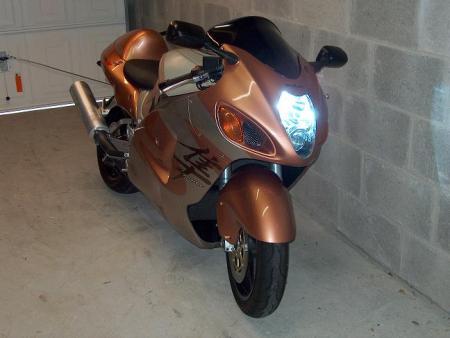
I’m just writing to you to send a photo of my hayabusa ( suzuki GSX R 1300 ) with a xenon kit.
I will be very happy if you put my photo in your gallery.
thank you.
Find More Motorcycle HID Kits Here!
Check out some more information regarding our Xtreme HID Lighting kits:
Tools Required:
10mm ratchet and socket
At least an 8 inch extension for the ratchet and socket
Small and medium flat head screwdrivers
Medium Phillips head screwdriver
Wire cutters
Wire crimpers
Electrical Tape
Small Connectors
30amp Fuses (at least 4)
Dremel Tool
Step 1: Remove the six clips on top of the bumper. Use a flat head screw driver and be very careful.
Tip: You may want to put a piece of tape around the end of the screw driver for extra protection from scratches

Step 2: Remove the six clips on the bottom of the bumper. There are 4 across the center and one on each side in front of each wheel.

Step 3: Remove the four screws from the bottom of the bumper. There are two on each side in front of each wheel.

Step 4: Remove the two screws that are located in the fenderwell. There is only one screw per side. It is located in between the bottom and the top of the fender.
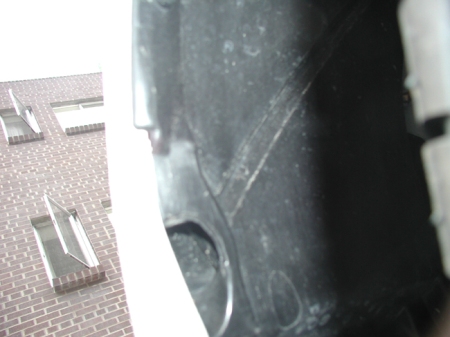
Step 5: Remove the top two 10mm bolts from each of the headlamps.

Step 6: Remove the 10mm bolt on the side of each headlamp.

Step 7: Using the socket and the extension, remove the bolt on the inside of headlamp. It is located right below the thin part of each headlight. Disconnect all other bulb harnesses. Remove the bottom metal piece (10mm bolt) from the stock headlamp, install the metal piece onto the JDM headlamp.

Step 8: Remove the low beam bulbs and the plugs that hold them in place.

Step 9: Using a dremel tool you need to remove a large portion of the stock bulb connector housing. It is pretty easy, but takes a while to get proper fitment. Be sure that you don’t do too much because it will cause the bulb to be lose. Take your time and continuously check using the HID bulb to make sure you get it perfect. You need to do this for both sides.

Step 10: Install the HID bulb using the stock connector housing to hold the bulb in place.

Step 11: I installed the ballests onto the fender. The fitment was good and it keeps it protected from the elements. I did this on both sides.

tep 12: Wire up the remainder of the kit following the supplied instructions. I covered the wires with electrical tape for a little extra protection and to give it an OEM quality look.
Step 13: Make sure everything works before reinstalling the bumper and the headlamps.

Step 14: Reinstall bumper reversing steps one through four.


For more information regarding our Xtreme HID Lighting kits please view this link:
http://www.kbcarstuff.com/HID_Kits_s/21.htm
BMW E90 335 – Xtreme 6000k D1S Low beam bulb upgrade & Xtreme H11 6500k Fog light HID upgrade
I was able to get a set of these D1S 6000k bulbs from Steve at Xenondepot (new site is http://www.KBcarstuff.com) to try and and give a review. The bulbs are made in Japan and are designed to be a plug+play upgrade for our vehicle. I also upgraded my OEM fogs to HID with their Xtreme 6500k. I was a little worried that installing this kit will trigger a fault however Steve let me try out a new kit that that is designed specifically for CANBUS vehicles. NO ERROR CODE or flashing occurred! This kit works!
Here are some pics/review:
Xtreme 6000k D1S bulbs:

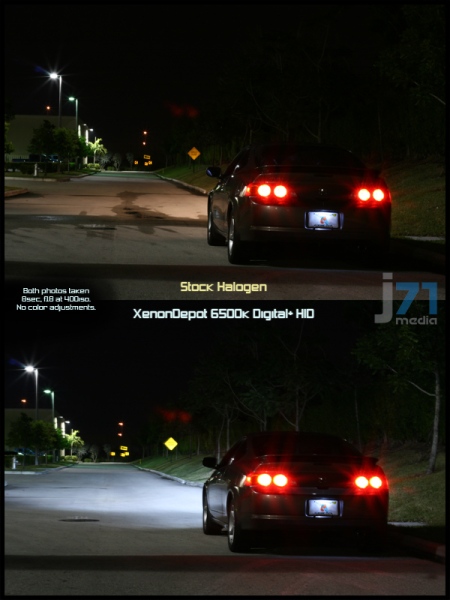
Installation was very easy and did not require ANY modifications to the vehicle. The Xtreme 6000k D1S bulbs plugged right in! The color is pure white with just the slightest touch of blue/purple. They look much better than the stockers, which I think looks slightly yellow.
Before/After:

The thing that surprised me the most is the light output. When it comes to colour temperature, the higer in terms of color/kelvin, the less output/lumens you get. These bulbs seem to be no exception but the loss here seems to be very, very minor. I’ve put 6000K ultinon bulbs in previous cars and the loss in output was much more noticeable than these. As I get older, I tend to stay away from mods that might compromise safety. I have no reservations on this mod as again, loss in ouput was negligible. In some aspect, I actually feel that the colour these bulbs emit help me see better at night as they light up the road with a slightly “more crisp” colour.
I’m very happy with these bulbs. They provide me with just the colour and brightness that I was looking for. If you’re looking for higher K bulbs and do not want to compromise light output, these bulbs will do just that!
H11 6500k Xtreme HID Fog Light Upgrade:

To start off, I would like to say that I was very concerned about installing a kit in the fogs in fear of the dreaded CANBUS. Steve let me try out a new kit that is specifically designed for these applications that will not trigger a fault. I was a little weary as I’ve read reviews where people tried “special kits” however still got the error code. However, based on my past experience with XenonDepot and their reputation I decided to give it a try. To sum it up in 2 words – IT WORKS! No error messages, no flashing lights, Im happy.
The kit comes with a special adaptor that is able to trick the CANBUS system into not throwing a code:

I have seen many kits that use similar looking components. However, what I liked about this kit was that the casing was completely sealed and water tight. This is important as the ballasts are mounted low where they will be exposed to water/moisture. The ballasts themselves are completely sealed as well (epoxy sealed) which made me comfortable as well knowing that they are mounted low as well. The rebased H11 bulbs plugged right into the stock fog light assembly with no modifications. The ballasts pluggred right into the vehicle’s OEM H11 fog light harness with a proper H11 mating connector. There was no wire splicing/cutting required. Everything was literally plug+Play and water tight. Here is the result:


To end off, I would like to say thank you to Steve at XenonDepot. I highly recommend this company for anyone that is looking for lighting upgrades. Their products are not always the cheapest, but most imortantly you are getting quality products with after sales service/support.
Here are the links to the products I used:
Xtreme D1S 6000k bulbs:
http://www.kbcarstuff.com/Xtreme_HID_6000k_D1S_Bulb_p/xt-d1s-6k.htm
H11 6500k HID Conversion kit:
http://www.kbcarstuff.com/H11_6500k_Xtreme_Xenon_HID_Conversion_Kit_p/xt-65k-h11.htm
CANBUS Fix (H11 option selected):
http://www.kbcarstuff.com/CANBUS_Fix_p/cbfix.htm
Note – All pictures were taken once the bulbs were fully warmed up.
You Can Find All Our Kits Here!
“Steve,
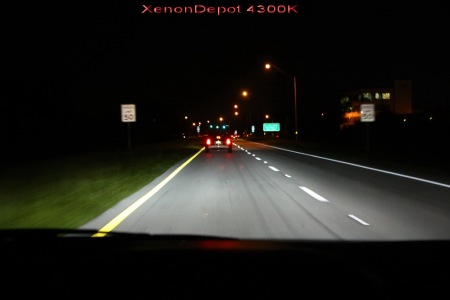
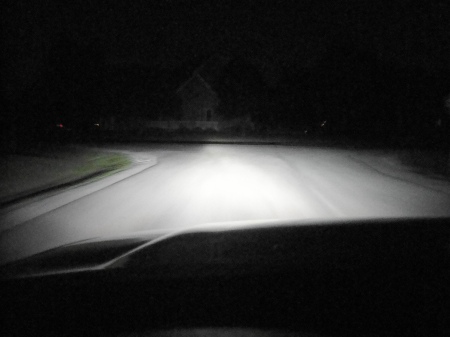
We just got back from our FL trip. I would say… very happy with this xenon kit. It’s VERY BRIGHT in white color (see pic.). On hwy, we didn’t see any complaining from other cars at all. There’s once from opposite direction that was flashing to us 2 times, but we found out later it was a warning sign of “cop is ahead” which we did see them couple miles later.
My wife is also very happy with the “white light”, in fact, she’s worry about troubles to other cars.
We drove all night from dawn to dust and “none problem found”.
I don’t have a chance to see the benefit of those 4300K Phillips set but for $200, it’s well worth it.
I took a lot of pictures, and selected pictures with the most accurate color from “what I see”.
Pictures are sent to info@KBcarstuff.com as I type this Email.
Again, thanks Steve for all your efforts to make customers satisfied.

